Creating a beautiful garden can feel overwhelming, especially when you want to add a personal touch. That’s why I put together this post—because DIY garden art is a fantastic way to unleash your creativity while enhancing your outdoor space. If you find joy in gardening or just love making things with your hands, this guide is perfect for you.
You’ll discover 15 inspiring projects that transform ordinary materials into unique garden art. Whether you’re looking to add a splash of color with painted rocks or create whimsical wind chimes that dance in the breeze, these ideas are not only fun but also accessible. Get ready to dive into the world of creative DIY art that will elevate your garden and bring a smile to your face!
So, grab your paintbrushes, old cans, and a sprinkle of imagination. This guide promises to set you on a rewarding journey of crafting your own garden masterpieces. By the end, you’ll have the skills and inspiration to make art that reflects your personality while beautifying your garden.
Key Takeaways
– Discover 15 unique DIY garden art projects, each one easy to create and perfect for any skill level.
– Explore colorful options such as painted rocks and mosaic garden art that can brighten up your outdoor space.
– Learn how to transform everyday items like tin cans and tires into delightful garden decorations.
– Get tips and tricks for creating functional art, including birdhouses and solar jar lights that attract wildlife and add ambiance.
– Feel inspired to unleash your creativity and personalize your garden with handmade pieces that tell your story.
1. Colorful Painted Rocks
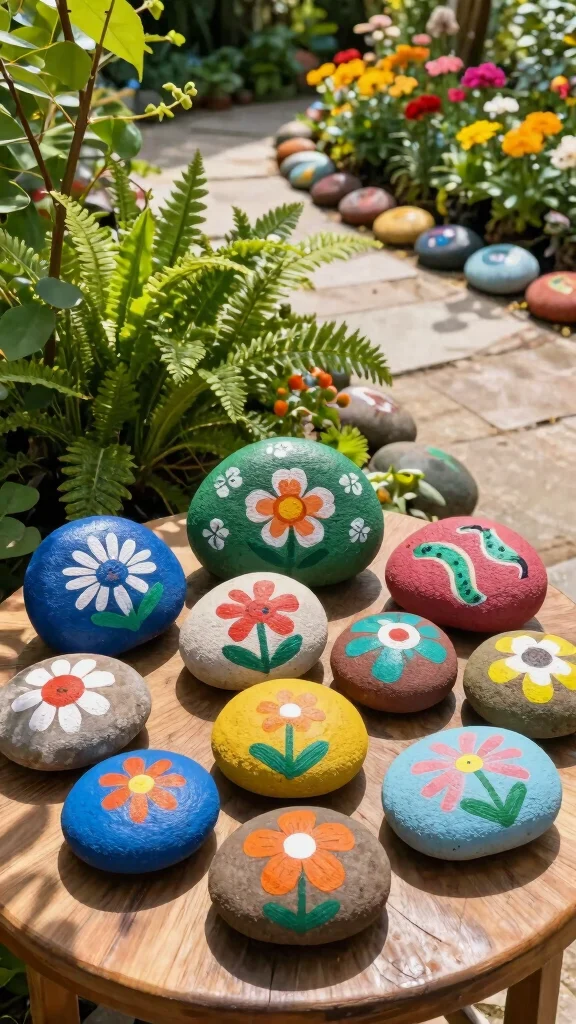
Looking to add a splash of color to your garden? Creating colorful painted rocks is a fun and simple DIY project that everyone can enjoy. These vibrant stones can line your garden path, blend among flowers, or serve as playful accents on your patio. With just a few materials, you can transform ordinary rocks into delightful art pieces that brighten your outdoor space.
Begin your project by collecting smooth stones of different sizes from your yard or a nearby park. Grab some outdoor acrylic paint and brushes to unleash your creativity. From cheerful polka dots to intricate mandalas, your designs can be as simple or detailed as you like. After painting, don’t forget to seal them with outdoor varnish to ensure they withstand the weather.
Steps to Create Colorful Painted Rocks:
– Collect smooth stones from your yard or park.
– Choose a color palette that complements your garden.
– Paint your designs using outdoor acrylic paints.
– Allow them to dry and seal with varnish.
– Place them throughout your garden for vibrant accents!
Tips: Try using glow-in-the-dark paint for a magical nighttime effect!
Frequently Asked Questions:
– Can I use regular paint?
It’s best to stick with outdoor acrylic paint for better durability.
– How long will they last?
With proper sealing, they can endure for years.
How To Choose the Right Materials for Your DIY Garden Rock Art
Choosing the right materials for your garden rock art projects is essential. The right materials will ensure your creations are durable, beautiful, and truly one-of-a-kind. Here are some key factors to consider when selecting materials:
1. Rock Type
The first step is selecting the right type of rocks. You can use river stones, slate, or even larger boulders. River stones are smooth and perfect for painting, while slate offers a more rustic look. Be sure to choose rocks that are not too porous if you plan to paint them, as this can affect how well the paint adheres.
2. Paint Quality
The quality of your paint matters! Opt for outdoor paints or acrylics that are weather-resistant. These paints are more durable and will withstand sun exposure and rain. Remember, vibrant colors can fade, so consider using a UV-protectant topcoat for added longevity.
3. Sealants and Finishes
After painting, protect your artwork with a sealant. Look for clear outdoor sealants that can resist moisture and UV rays. This will keep your garden rock art looking fresh for years. Spray sealants work well for larger pieces, while brush-on types can be used for smaller details.
4. Additional Decorative Elements
Think creatively about additional materials to enhance your rock art. Beads, glass gems, and even small mirrors can add unique flair. These elements can catch the light and add a charming touch to your garden décor. Just ensure any additions are suitable for outdoor conditions.
5. Budget Considerations
Keep your budget in mind as you select materials. While high-quality paints and sealants can be more expensive, they pay off in durability. You can often find rocks and decorative elements for free or at low cost in nature or local markets. Planning ahead helps you stay within your budget while still creating stunning art.
Pro Tip: Before starting your project, gather all materials and test your paint on a small rock. This allows you to see how colors look together and ensures that the finish will be what you want. Don’t rush—take your time to enjoy the creative process!
With these tips, you’ll be ready to dive into your DIY garden rock art projects. Selecting the right materials will help your artwork shine and withstand the elements, ensuring your garden remains an inspiring space for years to come. Enjoy crafting your unique designs!
2. Whimsical Garden Signs
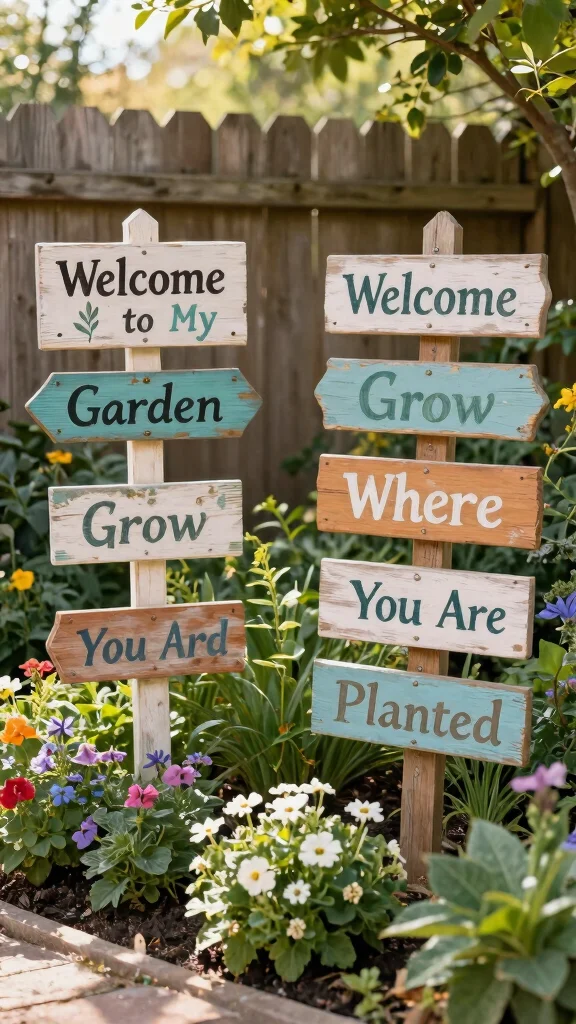
Looking to add personality to your garden? Whimsical garden signs can do just that while showcasing your creativity. You can make these charming signs from reclaimed wood, old fence panels, or even scrap metal. Personalize them with funny quotes, plant names, or playful arrows pointing to various areas of your garden.
You don’t need to be a woodworking expert to create these signs. A few basic tools, some reclaimed materials, and a dash of imagination are all you need. Sand down the wood for a smooth finish, then paint or stain it to match your garden’s theme. Using weather-resistant paint ensures your signs will last season after season.
Steps to Create Whimsical Garden Signs:
– Gather materials like wood, paint, and brushes.
– Decide on your text or design.
– Cut the wood to size, sand it, and apply your finish.
– Attach to a stake or hang in your garden.
Tips: Use stencils for neat lettering or let kids add their artistic touch!
Frequently Asked Questions:
– Can I use old pallets?
Absolutely! They can be transformed into beautiful signs with some creativity.
3. Mosaic Garden Art
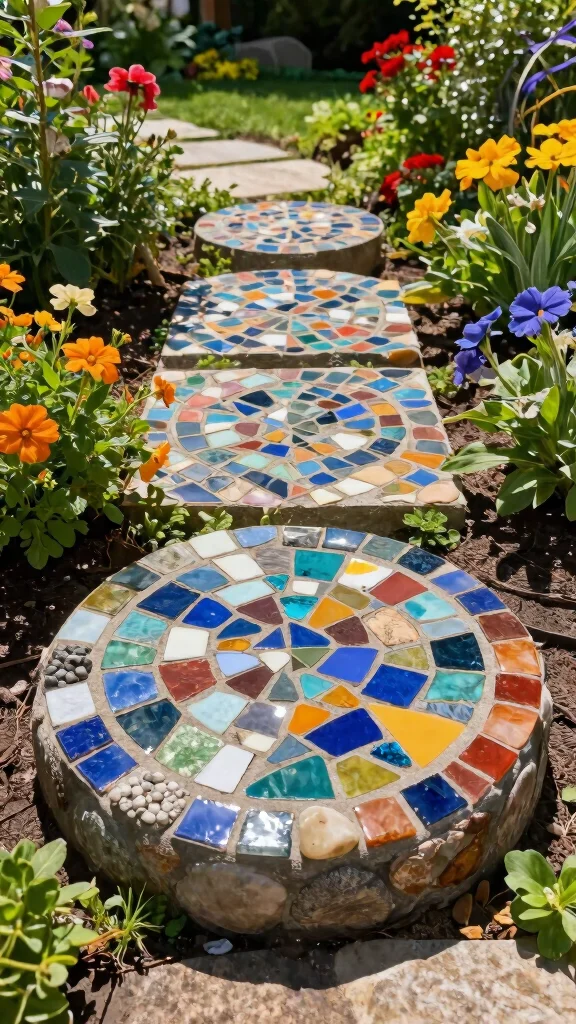
Want to add a splash of creativity to your garden? Mosaic art is a fantastic way to bring color and texture to your outdoor space. You can create stunning mosaic stepping stones, bird baths, or wall art using broken tiles, glass, or even old dishes. The beauty of mosaics lies in their versatility and the unique designs you can achieve.
Start your project with a sturdy base, like a round wooden board for stepping stones. Before adhering your pieces, lay out your design to see how it looks. Use mortar or glue to secure the pieces, then grout the gaps for a polished finish. This art form encourages creativity and results in eye-catching focal points in your garden.
Steps to Create Mosaic Garden Art:
– Collect materials such as broken tiles, glass, or stones.
– Plan your design and arrange the pieces on your base.
– Use adhesive to secure the pieces, then fill gaps with grout.
– Seal your mosaic to protect it from the elements.
Tips: Use bright colors for a vibrant effect or earthy tones for a natural look!
Frequently Asked Questions:
– How long does it take to dry?
Drying time varies by material, but typically expect 24-48 hours.
4. Upcycled Tin Can Flowers
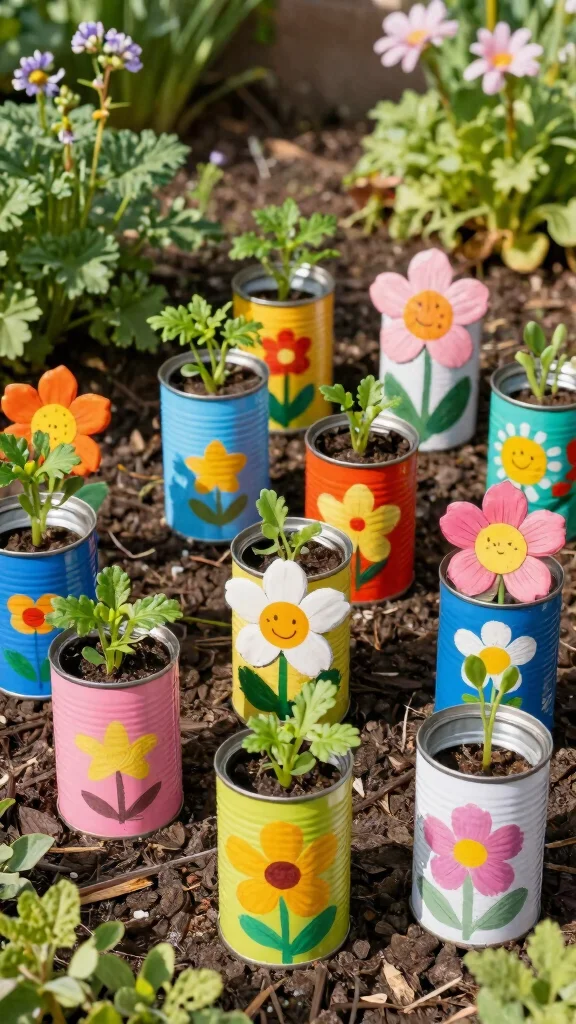
Looking for a creative way to recycle? Transform old tin cans into colorful garden flowers! This fun project is perfect for teaching kids about recycling while crafting beautiful art for your garden. It’s simple and requires only a few basic materials.
Start by cleaning the cans and removing labels. Use a hammer and nail to poke drainage holes in the bottom. Then, paint the outside with bright colors and fun patterns. If you’d like, cut the tops into petal shapes for added flair. Once dry, fill the cans with soil and plant your favorite flowers or herbs inside!
Steps to Create Upcycled Tin Can Flowers:
– Clean and prepare your tin cans.
– Paint them in vibrant colors or patterns.
– Cut the top into petal shapes if desired.
– Fill with soil and plant flowers or herbs.
Tips: Use various can sizes for an interesting dynamic in your garden!
Frequently Asked Questions:
– Do I need to seal the paint?
Using a sealant is recommended to protect your artwork from the weather.
5. Birdhouse Creations
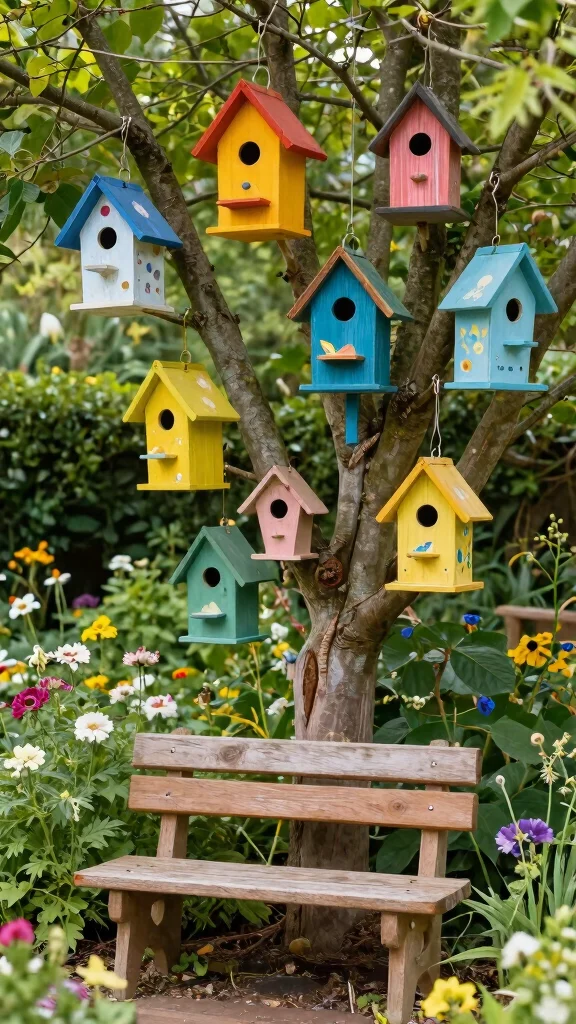
Want to invite birds into your garden? Crafting whimsical birdhouses is a delightful way to enhance your outdoor space. You can build them from scratch or repurpose old materials to create unique designs. Whether simple wooden structures or elaborate creations, birdhouses add charm and functionality to your garden.
Paint your birdhouses in bright colors or incorporate fun designs for a personal touch. Hang them from trees or place them on posts to not only beautify your yard but also provide shelter for local birds, creating a serene habitat.
Steps to Create Birdhouses:
– Gather materials: wood, nails, paint, and a drill.
– Design your birdhouse, considering local bird species.
– Assemble the pieces and ensure ventilation holes are included.
– Paint and decorate as desired.
Tips: Ensure birdhouses are safe by avoiding toxic paints and sharp edges!
Frequently Asked Questions:
– How can I attract birds?
Adding bird feeders nearby can enhance the appeal.
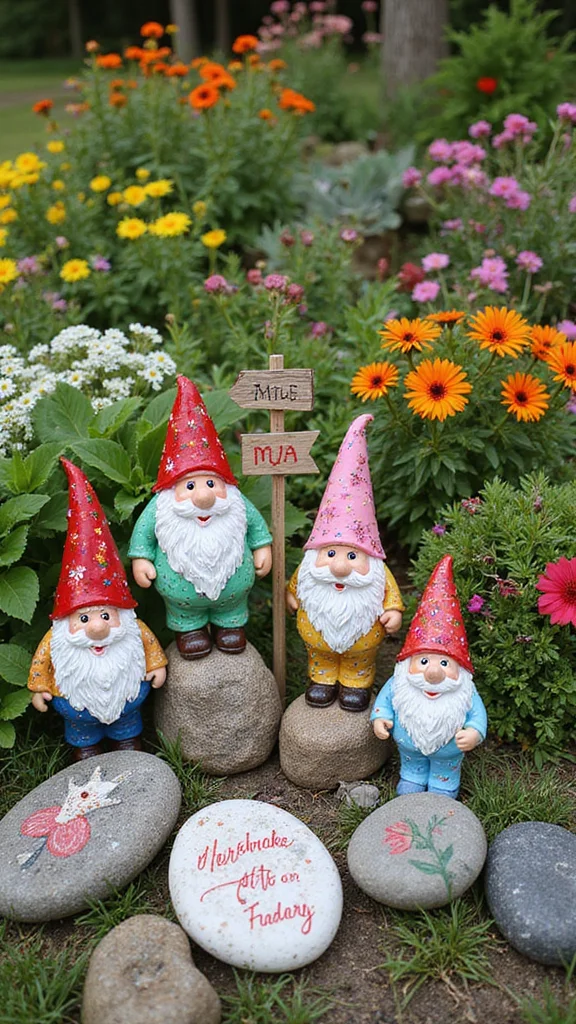
6. Garden Gnomes
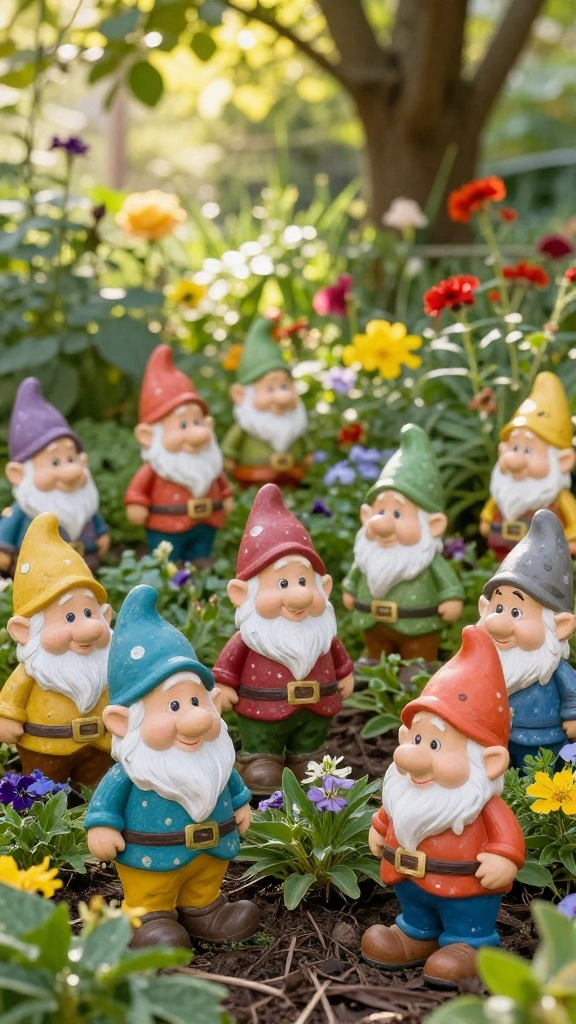
Bring a touch of whimsy to your garden with handcrafted garden gnomes. These charming figures made from clay, stone, or recycled materials let your creativity shine. You can personalize your gnomes by choosing colors, shapes, and sizes that fit your garden’s theme.
To create your own gnome, mold the base using air-dry clay, adding features like hats and beards for personality. Once dried, paint them in cheerful colors and seal with a weatherproof coat. Scatter them around your garden or cluster them for a delightful display.
Steps to Create Garden Gnomes:
– Gather materials like air-dry clay or stones.
– Sculpt your gnome, focusing on unique details.
– Allow to dry, then paint with bright colors.
– Seal with a weather-resistant finish.
Tips: Incorporate found objects like bottle caps for eyes to add character!
Frequently Asked Questions:
– Can I use different materials?
Absolutely! Old bottles or cans can also create fun gnome figures.
📹 Related Video: DIY Concrete Gnome Garden Art | DIY Awesome SculptCrete | Cement Art
7. Recycled Tire Planters
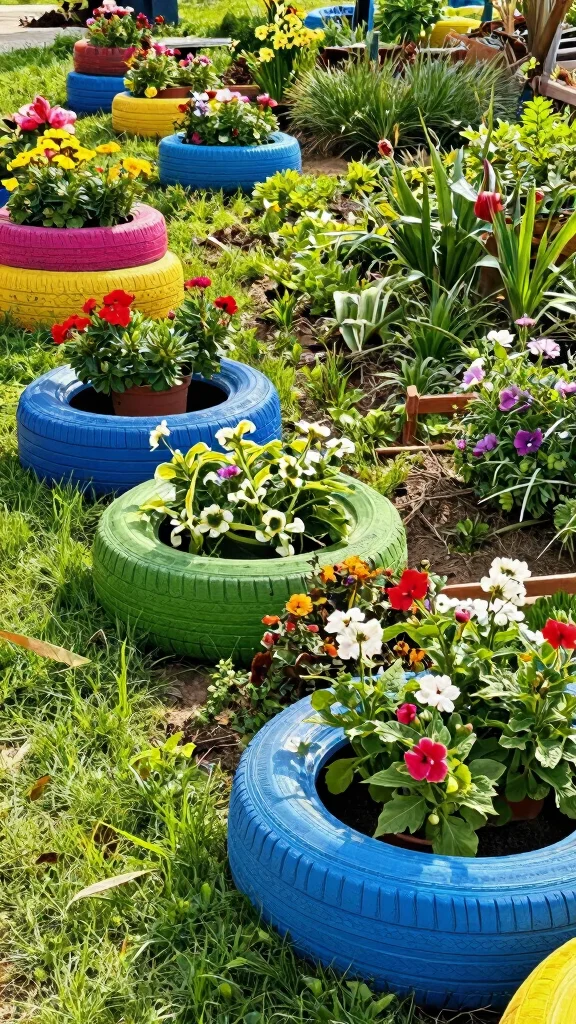
Transform old tires into eye-catching planters! Recycled tire planters not only reduce waste but also add an artistic element to your garden. By painting tires in bold colors or creating whimsical designs, you can create striking focal points.
To make your tire planters, start by cutting the tire in half or using it whole for larger plants. Paint the exterior for a vibrant look, then fill with soil and your favorite flowers or herbs. Arrange them at various heights for a stunning display.
Steps to Create Recycled Tire Planters:
– Source used tires from local shops or friends.
– Cut and paint the tires as desired.
– Fill with soil and plant beautiful flowers.
Tips: Stack tires for a tiered effect and varied plant heights!
Frequently Asked Questions:
– Are tire planters safe for the garden?
Yes, just ensure you use non-toxic paint and good drainage.
You might also like
8. Painted Wooden Bench
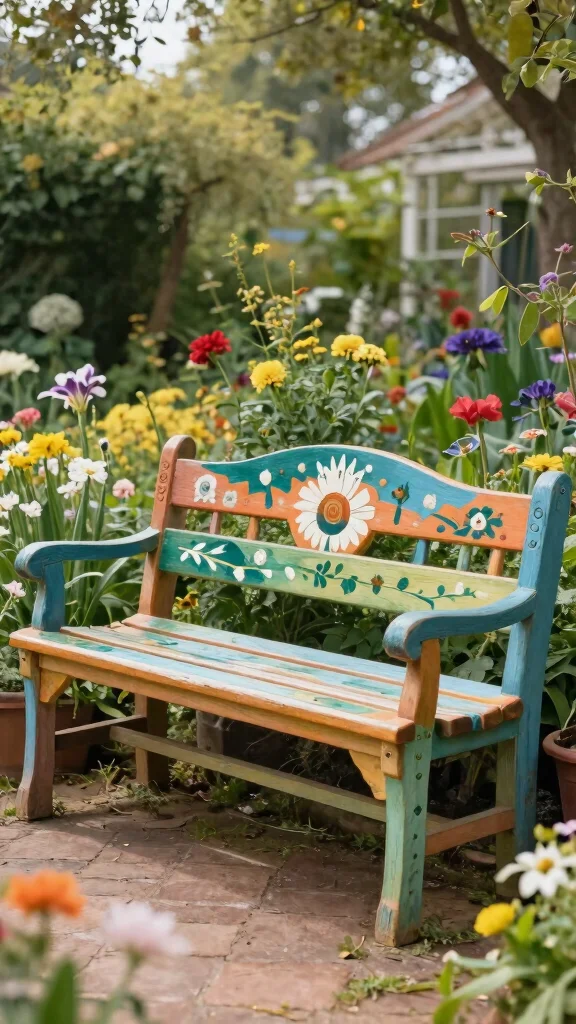
Transform a simple wooden bench into a colorful feature for your garden. By painting it with fun designs or quotes, you create a functional art piece that enhances your outdoor aesthetic while providing a cozy spot to relax.
Start with a clean, sanded bench. You can paint it in one solid color or use stencils for patterns. Make sure to use outdoor paint to protect your creations. Once done, place it under a tree or near your flower garden for a perfect relaxation nook.
Steps to Create a Painted Wooden Bench:
– Clean and sand the bench to prepare it for painting.
– Choose colors and designs for customization.
– Paint using outdoor paint, allowing it to dry between coats.
Tips: Opt for weather-resistant wood for enhanced durability!
Frequently Asked Questions:
– How often should I repaint?
Every couple of years, depending on the weather exposure.
Fun fact: a painted wooden bench with weatherproof outdoor paint can last 3–5 years in a garden, keeping your colorful art piece blooming longer. A single bench transforms a bare corner into a cozy relaxation nook.
9. Fairy Garden Creations
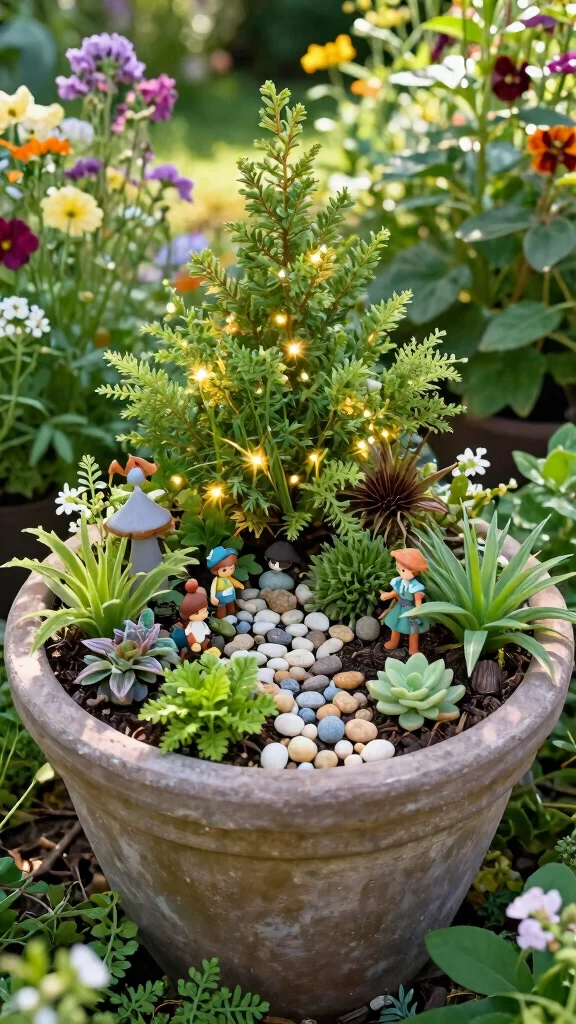
Create a magical fairy garden that ignites imagination! This enchanting project is perfect for all ages and can be made in a small patch of your garden or in a container. Start with tiny plants, miniature figurines, and decorative elements to set the scene.
Choose a container or designate a small area in your garden for your fairy haven. Add soil, then plant miniature flowers, moss, and succulents. Sprinkle in fairy figures or DIY fairy houses made from twigs and pebbles. This magical space invites creativity and storytelling, turning your garden into a whimsical world.
Steps to Create a Fairy Garden:
– Select a container or garden area for your creation.
– Add soil and plant miniature flowers or succulents.
– Decorate with tiny fairy figurines, houses, and natural materials.
Tips: Consider using LED fairy lights for a magical nighttime glow!
Frequently Asked Questions:
– How do I maintain my fairy garden?
Regular watering and pruning will keep it thriving.
Fun fact: Fairy gardens packed with moss, mini figurines, and garden rock art can fit in a 12-inch container or a small patch—yet they spark big imagination in every viewer. Tiny details invite big stories, so start with one mini scene today.
10. Whimsical Wind Chimes
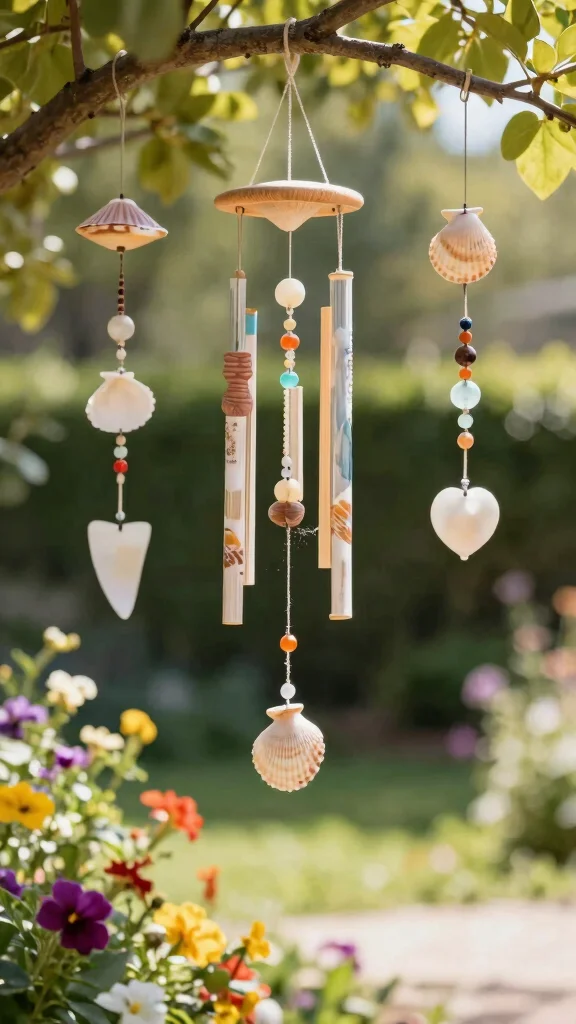
Create beautiful and melodic wind chimes using recycled materials like seashells, old silverware, or colorful beads. These wind chimes add delightful sounds to your garden, enhancing the peaceful atmosphere. This project is an excellent way to get creative with materials you have at home.
Start by collecting your chosen items and a strong string or wire to hang them. Arrange the materials so they can move freely and create sound when the wind blows. You can use a wooden branch as a base for a natural look or paint one for a pop of color. Not only do these chimes beautify your space, but they also provide an auditory experience.
Steps to Create Whimsical Wind Chimes:
– Gather materials like shells, beads, or old spoons.
– Choose a base, like driftwood or a painted branch.
– Assemble materials on strings, ensuring they can sway freely.
Tips: Mix materials for unique sounds and visual appeal!
Frequently Asked Questions:
– How long will they last outdoors?
With proper sealing, your wind chimes can endure various weather conditions.
11. Garden Stepping Stones
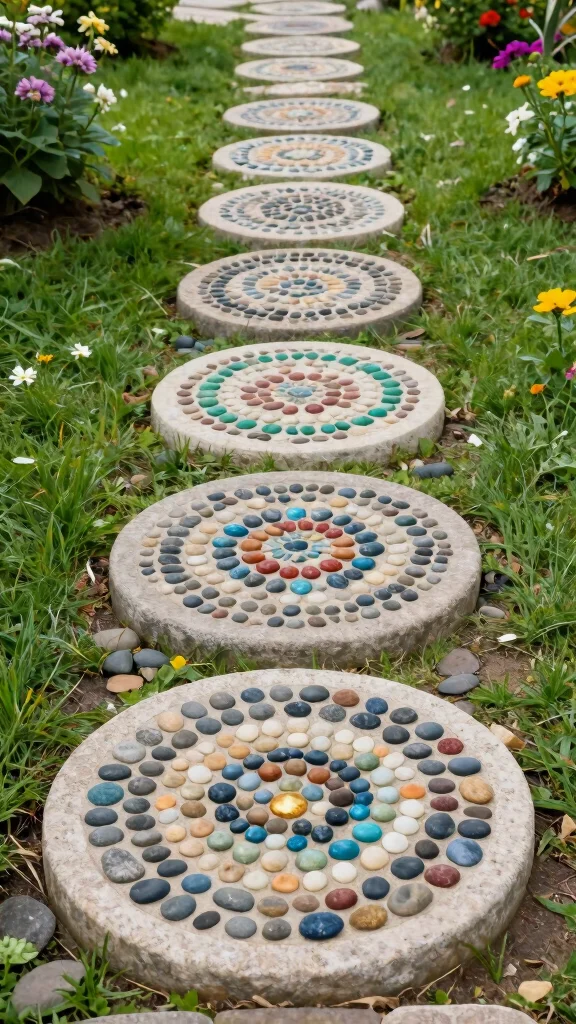
Enhance your garden pathways with personalized stepping stones. This DIY project lets you showcase your style and creativity while adding a functional aspect to your garden. You can make stepping stones from concrete or use kits available at craft stores.
Start by mixing the concrete according to package instructions and pour it into molds, such as old cake pans or plastic containers. Before it sets, embed decorative items like pebbles or marbles for a personal touch. Allow the stones to cure completely before placing them in your garden for a unique look.
Steps to Create Garden Stepping Stones:
– Gather concrete mix and molds (like cake pans).
– Mix the concrete and pour it into the molds.
– Decorate the top with stones or personal designs before it sets.
Tips: Use colorful glass marbles for a stunning effect!
Frequently Asked Questions:
– How long do they take to set?
Typically 48 hours, depending on temperature and humidity.
12. Solar Jar Lights
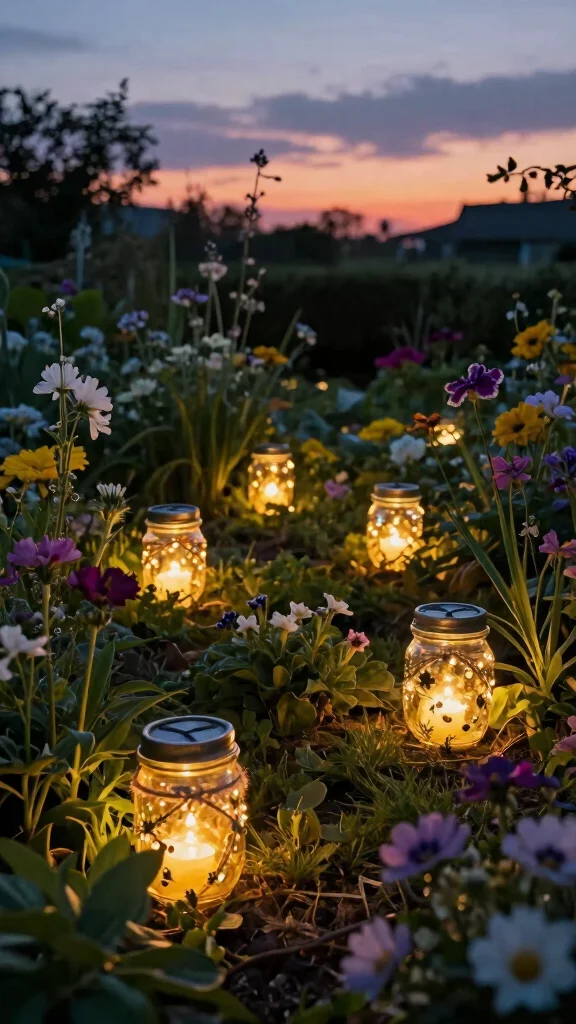
Illuminate your garden with charming solar jar lights. This eco-friendly project adds a warm glow to your outdoor space during the night. You can easily create these using mason jars and solar lights, making it a perfect DIY activity.
Start by gathering mason jars and solar garden lights. Remove the tops of the solar lights and fit them into the jars. Decorate the jars with paint, twine, or embellishments to match your garden’s style. Place them around your garden for a magical ambiance that enchants during evening hours.
Steps to Create Solar Jar Lights:
– Collect mason jars and solar lights.
– Remove the tops of the solar lights and fit them into the jars.
– Decorate the jars as desired.
Tips: Use different sizes of jars for a dynamic lighting effect!
Frequently Asked Questions:
– How long do they last?
Solar lights typically last several hours after charging during the day.
13. Nature-Inspired Wall Art
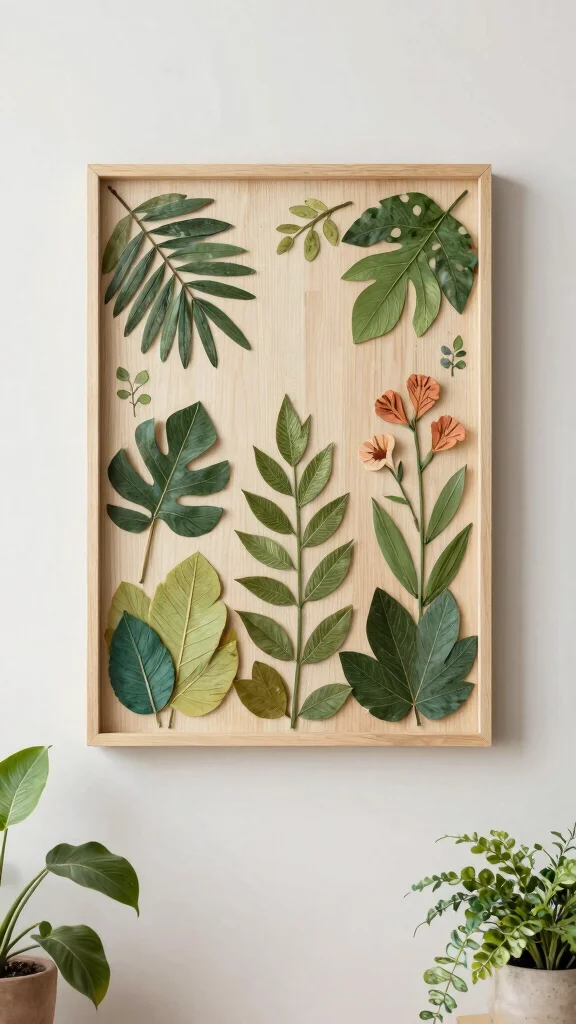
Bring the beauty of nature into your home by creating nature-inspired wall art. Use elements like leaves, flowers, or twigs to capture the essence of your garden. This project allows you to transform natural materials into beautiful art pieces that enhance your indoor decor.
To start, gather natural materials and choose a canvas or wooden board for your base. Arrange your items in an artistic pattern and secure them using glue or a natural adhesive. You can paint the background or leave it natural for a rustic touch. This artwork not only beautifies your home but also serves as a lovely reminder of your garden’s beauty.
Steps to Create Nature-Inspired Wall Art:
– Collect natural materials like leaves, flowers, and twigs.
– Arrange them on a canvas or board.
– Secure with glue and paint the background if desired.
Tips: Press leaves beforehand to preserve their shape!
Frequently Asked Questions:
– How do I keep it from deteriorating?
Use a protective finish to seal the art from moisture and dust.
14. Herb Spiral Garden
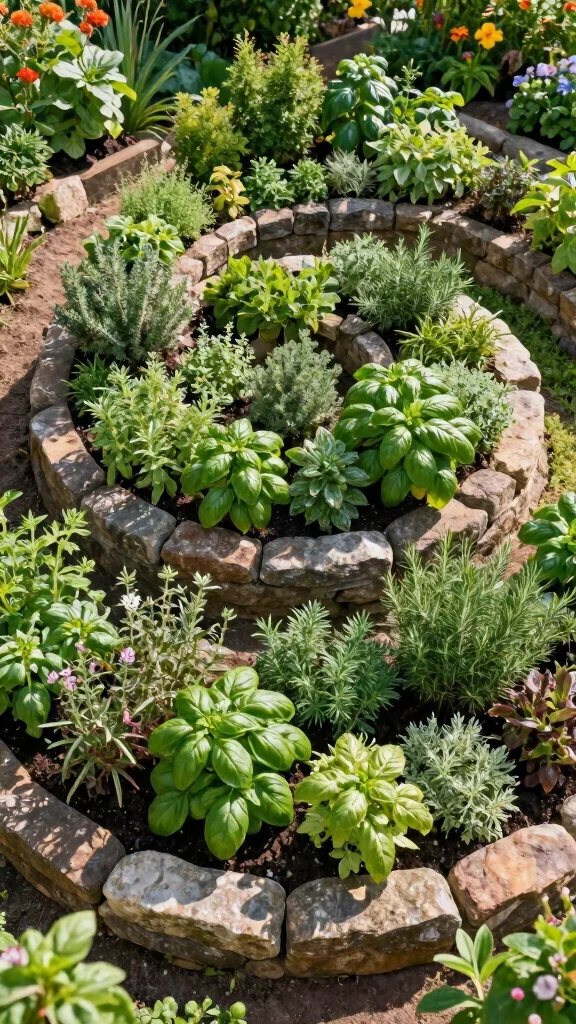
Create a stunning and functional herb spiral garden that showcases your love for gardening while adding structure to your outdoor space. This design allows various herbs to thrive due to the different microclimates established in the spiral.
To build your herb spiral, select a sunny location and outline the spiral shape. Use stones, bricks, or logs to form the walls. Fill the spiral with high-quality soil and plant a variety of herbs along the path. Herbs at the top will enjoy more sunlight, while those at the bottom will thrive in slightly shadier conditions. This project maximizes space and enhances your garden’s beauty.
Steps to Create a Herb Spiral Garden:
– Choose a sunny spot and outline the spiral shape.
– Build the walls with stones, bricks, or logs.
– Fill with soil and plant your herbs accordingly.
Tips: Select herbs that complement each other regarding water needs!
Frequently Asked Questions:
– How much space do I need?
A spiral can be built in a small area, making it ideal for any garden size.
15. Nature’s Sound Garden
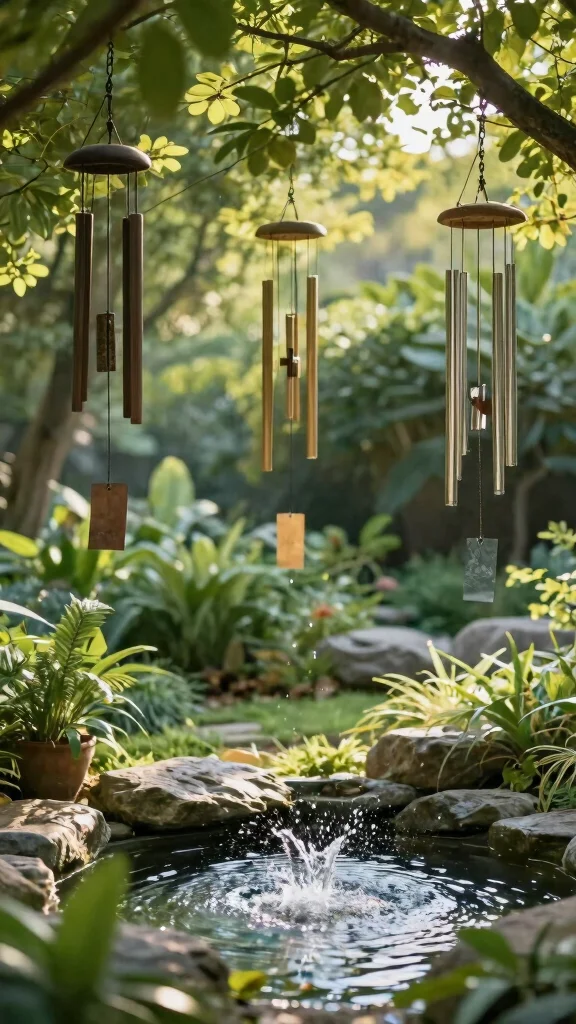
Design a nature’s sound garden filled with elements that produce soothing sounds to enrich your outdoor tranquility. This project involves integrating wind chimes, water features, and rustling plants to create a symphony of natural sounds.
Start by selecting a peaceful spot in your garden that can host various sound elements. Incorporate wind chimes made from different materials, add a small fountain, and arrange plants that softly rustle in the wind. This space becomes a serene retreat, allowing you to relax and unwind while enjoying nature’s music.
Steps to Create a Nature’s Sound Garden:
– Choose a peaceful spot in your garden.
– Add wind chimes and a small water feature.
– Plant rustling plants nearby to enhance the sound experience.
Tips: Arrange the elements to allow easy movement and access for full enjoyment of the space!
Frequently Asked Questions:
– What plants work best?
Consider grasses, like ornamental grasses, that produce gentle sounds with the breeze.
A peaceful garden is built one sound at a time. Start with a quiet corner, add wind chimes, a gentle fountain, and rustling plants—then listen as your Nature’s Sound Garden turns every breeze into a tiny concert.
Conclusion
Engaging with your garden through DIY art projects is a fantastic way to express creativity while enhancing the beauty of your outdoor space. From quirky painted rocks to enchanting fairy gardens, each project invites a personal touch that reflects your unique style.
These 15 inspiring DIY garden art ideas provide a canvas for your imagination and a pathway to a more vibrant garden. So, gather your materials and let your creativity bloom—your garden will thank you for it!
Frequently Asked Questions
How do I get started with garden rock art if I’m a beginner?
Getting started with garden rock art is easier than you think. Pick a couple of flat stones, clean them well, and sketch a simple design in pencil.
Gather supplies: flat stones, non-toxic outdoor acrylic paints, small brushes, a cup of water, and a weatherproof sealant to protect your finished piece. Paint in thin layers and let each layer dry, then finish with a UV- and weather-resistant sealant. Place your first piece in a garden spot that complements your plants. This is how you begin your garden rock art journey—one stone at a time.
What materials do I need for DIY garden art, and how do I choose safe, weatherproof options?
Essential materials for DIY garden art include: flat stones, outdoor acrylic paints in your chosen colors, a few small brushes, a cup of water, and a weatherproof sealant.
For a polished finish, consider priming very smooth rocks, sketching your design first, and using UV-resistant paints. Choose non-toxic, outdoor-safe products to protect your garden rock art and your plants. If you want more durability, add a clear exterior resin or varnish and let it cure fully before outdoor exposure.
How can I make my garden rock art durable and weatherproof for outdoor use?
To make your garden rock art durable and weatherproof: start with clean, dry rocks and use thin coats of paint, letting each coat dry completely. Apply a couple of layers of UV-resistant, weatherproof sealant to lock in color. For longevity, place pieces in sheltered spots and avoid ground contact by using a small pedestal or edging. Routine maintenance includes wiping off moss or dirt and reapplying sealant every year or two.
How can I design a cohesive garden using garden rock art and other DIY pieces?
Designing a cohesive garden with rock art means planning a theme and color palette. Choose a motif (beachy blues, woodland greens, or bold geometric). Group pieces in small clusters near focal plants or along pathways. Match finishes and colors across all DIY pieces so garden rock art feels intentional, not random. Consider scale and height; combine low-lying stones with a taller sculpture to add rhythm.
What are quick, beginner-friendly garden art ideas I can start today?
Yes! Here are quick, beginner-friendly ideas you can start today:
1) Painted stones as plant markers: label herbs or perennials with legible letters using a fine brush; seal when dry.
2) Simple stone cairns as decorative accents: stack 3-5 rocks into a small sculpture; secure with a dab of outdoor-safe adhesive if desired.
3) Mood stones: paint patterns that echo your garden colors for seasonal pops.
4) Rock edge borders: place a row of decorated stones along a path to guide the eye.
5) Upcycled plant stakes: glue decorative stones to wooden stakes for easy-to-read markers.
Each project uses minimal supplies and can be completed in an afternoon, adding charm to your garden DIY style.
Related Topics
DIY garden art
garden rock art
creative projects
outdoor decor
beginner friendly
easy crafts
nature-inspired
seasonal gardening
upcycled art
colorful designs
family activities
budget friendly